Traverse Global v11.2 - Service Repair
Manage Queue
The Manage Queue function allows you to review documents that both need to be sent, and have been sent.
When you configure a document using the Document Settings function and mark the Auto Send check box, the system will deliver the document immediately. If you cleared the Auto Send check box, the system will place the document into the Document Delivery Queue.
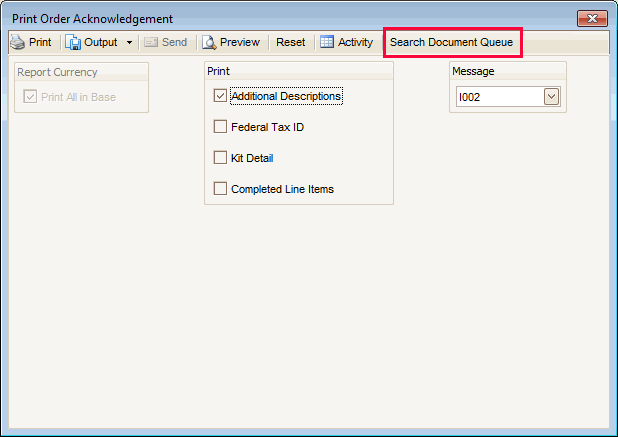
When you print a document you have configured in the Document Settings function, in the Print window that opens you have the option to access the queue using the Search Document Queue button to open the Search Document Queue screen, which allows you to search documents the customer, vendor, or employee selected.
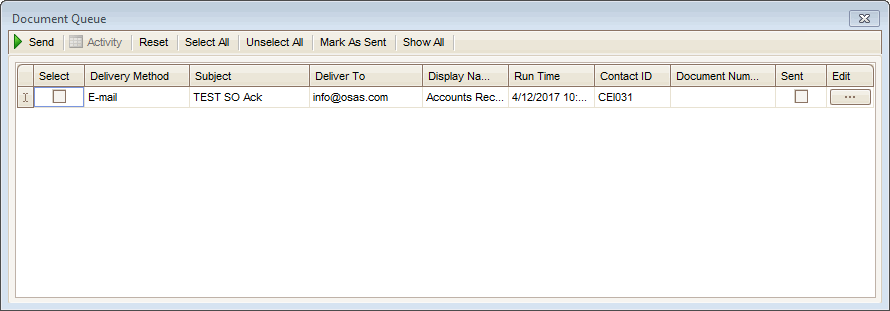
When you print the document, a Print Status window will appear.

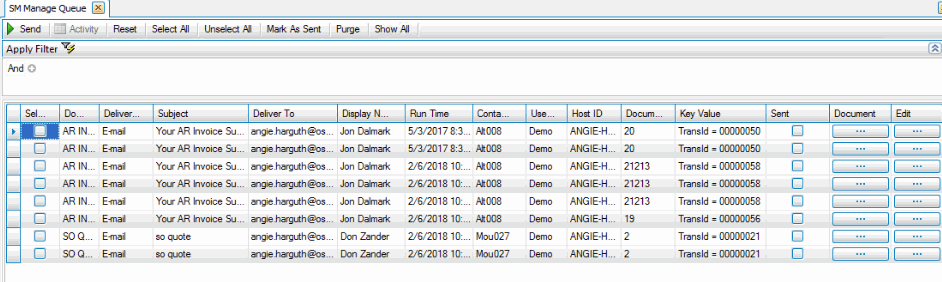
When you close the Print Status window, the Document Queue screen will display showing all documents currently in the queue.
Alternately, when you print an archivable document and click on the Search Document Queue button on the toolbar, a similar Search Document Queue screen displays documents currently in the queue. To see documents that have been sent, press the Show All button.
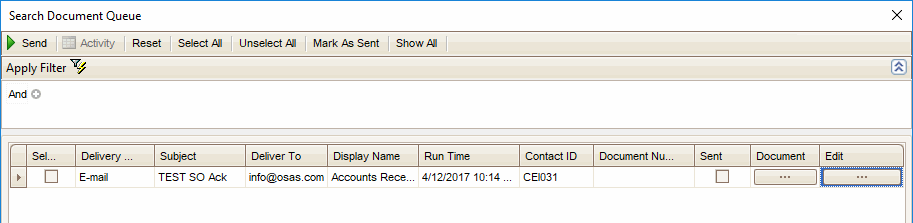
To view the document, click on the Document button. If you want to edit the Subject, the Deliver To, and/or the Display Name of the document before you send it, click on the Edit button ( ) to open the Edit Document Queue dialog box.
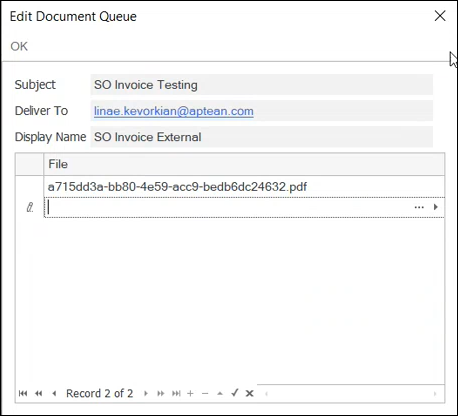
Click on the button () to add attachments to the document in the queue. Note: You cannot add attachment for documents that are marked 'Sent'.
Click OK to save your edits and return to the Document Queue screen. Note: You cannot edit documents that are marked 'Sent'.
To send the document, mark the Select check box and click the Send button. You can remove sent documents from the queue by using the Purge function in the Manage Queue screen.
- Use the Data Filter to select the range of filtering options or leave the filter blank to include all available data.
-
If you want to edit the Subject, the Deliver To, and/or the Display Name of a document before you send it, click on the Edit button (
) to open the Edit Document Queue dialog box.
-
Click on the button (
) to add attachments to the document in the queue. Note: You cannot add attachment for documents that are marked 'Sent'. -
Click OK to save your edits and return to the Document Queue screen. Note: You cannot edit documents that are marked 'Sent'.
- To send a document, mark the Select check box for the document, then click the Send button on the toolbar. The Document Delivery Status window will appear and display the delivery status of the document.
- To mark a document as Sent if the Sent check box is clear, select the document(s), then click the Mark As Sent button. The Purge function will only remove sent documents from the queue.
- Click a command button to
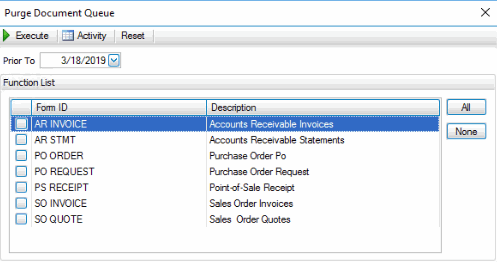
Click To Send Send the selected documents. Reset Set all fields to their default values. Select All Mark the Select check box for all documents. Unselect All Clear the Select check box for all documents. Mark As Sent Mark the selected documents as Sent. This allows the documents to be removed from the queue via the Purge function. Purge Removes documents from the queue. Only documents that have been sent or are marked as sent can be purged. Show All/Hide Sent Filters the list to show sent and unsent documents, or only unsent documents. - To purge sent documents from the queue (history), the Sent check box must be marked. Once the Sent check box is marked for each document you want to remove from the queue, click the Purge button. The Purge Document Queue window appears. Select a date before which all sent documents will be removed from the queue in the Prior To field. This means any sent document with a Run Time before the Prior To date will be removed from the queue.
The Function List displays the Form ID(s) (document types) of any sent documents in the queue. To purge all sent documents of a particular type, mark the check box for the form ID. Use the All button to mark all check boxes. Use the None button to clear all check boxes.
Click a command button to:
Click To Execute Purge sent documents of the selected type(s). Activity Open the Activity Log to view previous purging activity. Reset Set all fields to their default values.